
Field Notes from N1JUR
Real-world ham radio tips, portable operating lessons, gear thoughts, and activation stories from the field to the shack.
What You’ll Find Here
This blog is where I go deeper than a YouTube description. You’ll find practical ham radio guides, activation lessons, gear breakdowns, and field notes from real operating experiences.
Some posts are beginner-friendly. Some get a little more technical. And some are just honest lessons from the field — because not every activation goes perfectly, and that’s usually where the good stuff happens.
Portable operating tips
POTA, SOTA, and location-based activation ideas
Gear and antenna experiments
Beginner-friendly ham radio guides
Field stories and lessons learned

Ham Radio Clubs: A World of Variety Awaits!
In today’s digital age, online clubs are becoming increasingly popular. These virtual gatherings allow you to connect with hams from different countries without leaving your home. You can participate in discussions, share tips, and even engage in contests—all from the comfort of your couch! Online clubs often have forums, chat rooms, or even live video meetings, making it easy to forge friendships and share knowledge with fellow enthusiasts.
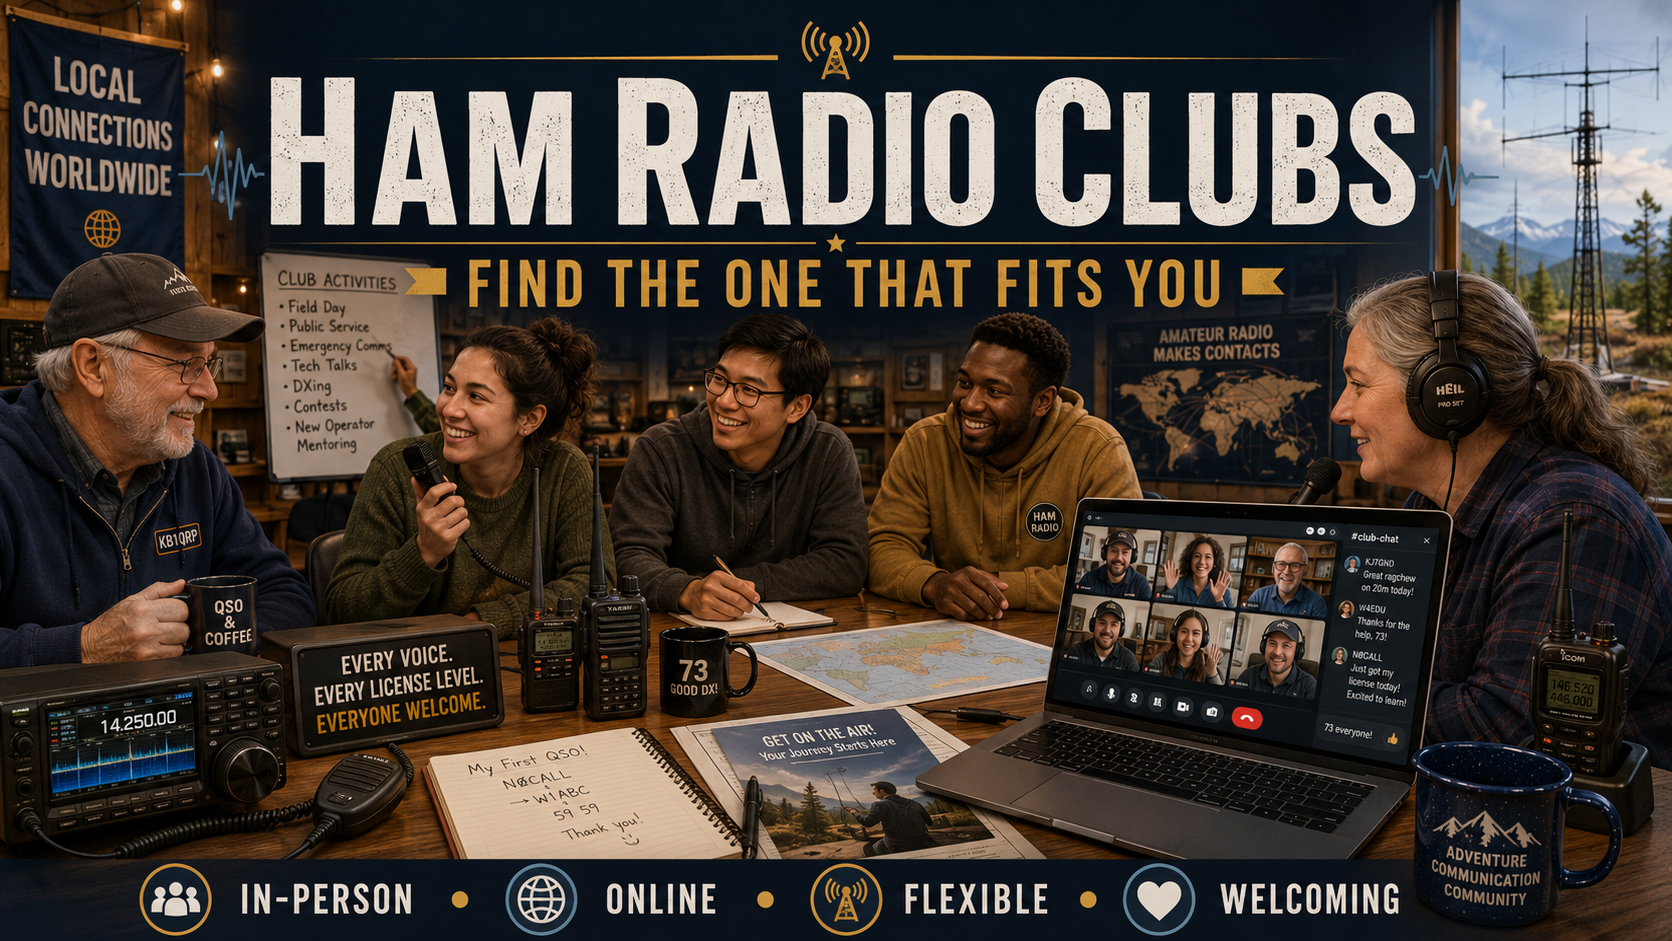
Hey there, fellow radio aficionados! Today, let’s dive into the wonderful world of ham radio clubs. If you’ve ever thought about joining one (or if you’re already a member), you probably know that these clubs come in all shapes and sizes. Whether you’re into contesting, experimenting with new tech, or just want to hang out with like-minded folks, there’s a ham radio club out there that’s perfect for you!
Clubs for Everyone
First off, let’s talk about the sheer diversity of clubs. Some are very structured with regular meetings and a clear hierarchy, while others are more laid-back and informal. You might find a club that meets in person once a month at a local coffee shop, or maybe you’ll join an online group that connects members from all over the globe. The beauty of ham radio clubs is that they can be whatever you want them to be!
Online Clubs: Connect from Anywhere
In today’s digital age, online clubs are becoming increasingly popular. These virtual gatherings allow you to connect with hams from different countries without leaving your home. You can participate in discussions, share tips, and even engage in contests—all from the comfort of your couch! Online clubs often have forums, chat rooms, or even live video meetings, making it easy to forge friendships and share knowledge with fellow enthusiasts.
Loose Structures: Flexibility is Key
Not every club needs to have a rigid structure. Some clubs are loosely organized, focusing more on the shared love of radio than on formalities. In these settings, you might find that the emphasis is on socializing and collaboration rather than strict rules and agendas. This flexibility can create a relaxed environment where everyone feels welcome to share their interests and experiences. Whether you’re a seasoned pro or just starting, these clubs can be a fantastic way to learn at your own pace.
Like What’s Happening Here?
N1JUR is built around helping more people get active in ham radio through videos, Field Notes, POTA content, live streams, gear reviews, and community.
If you already watch the channel and want to support more of the work behind it, memberships are one way to help keep the signal going.
Videos. Field Notes. Live Streams. Community.
Membership support helps keep the N1JUR ecosystem moving without turning every page into a pledge drive wearing a callsign hat.
Learn About the Community →Clubs with a Purpose: Contesting and Emerging Communications
If you have a specific passion, you’ll likely find a club that caters to it. For instance, if you’re all about contesting, there are clubs dedicated to competitive operating, where members can hone their skills and take part in exciting contests together. On the flip side, if you’re interested in emerging communication technologies—like digital modes or mesh networking—there are clubs focused on exploring the latest advancements in the field. These specialized clubs can provide invaluable insights and foster a strong sense of community among members who share your specific interests.
Make It Your Own
At the end of the day, the beauty of ham radio clubs is that they can be what you make them. You have the freedom to choose a club that aligns with your interests and lifestyle. Want to start a new club focused on a niche topic? Go for it! Interested in gathering a few friends for casual radio chats? That’s a club too! The possibilities are endless.
Wrapping Up
So, whether you’re looking for camaraderie, competition, or just a casual chat about all things radio, there’s a ham radio club out there for you. Embrace the variety, explore your options, and remember that the most important part is to have fun and connect with others who share your passion. Happy hamming, everyone!

Boosting the Amateur Radio Relay League: Attracting More Radio Operators with a Fresh Approach
The ARRL has been a cornerstone of amateur radio for decades, but let’s be honest — the hobby has changed, and so have the operators we’re trying to reach. In this post, we take a look at how the ARRL could freshen up its approach, attract more licensed hams, and build a stronger, more welcoming community through better member perks, modern digital resources, gear discounts, and real engagement that gets operators excited to be part of something bigger.
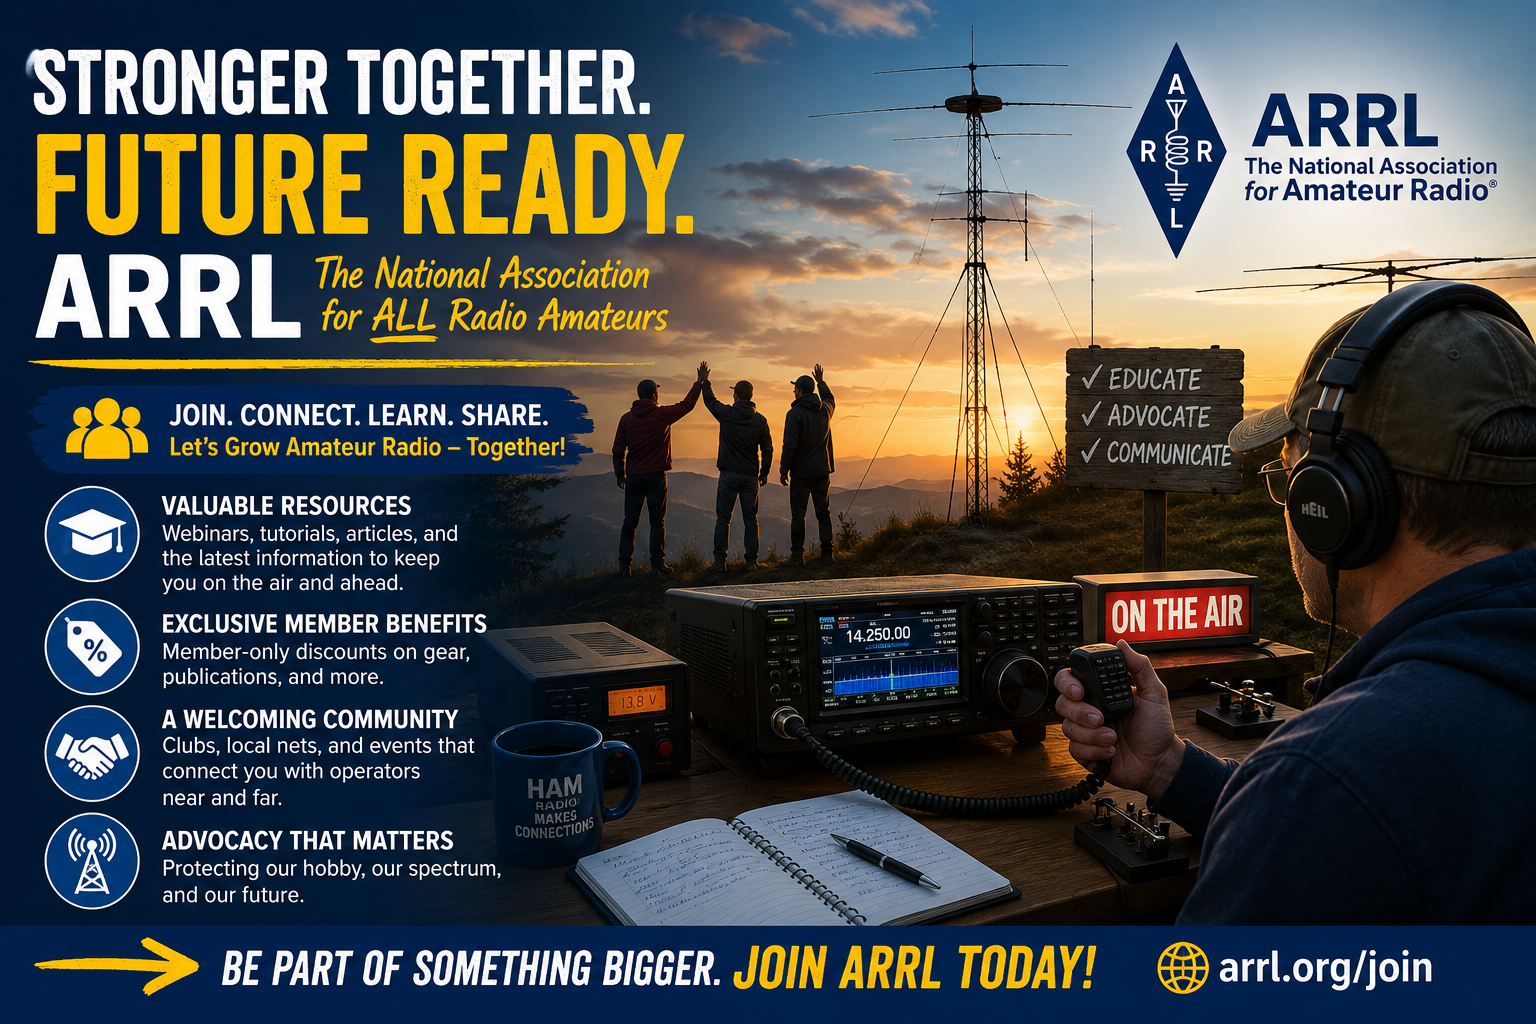
Hey there, fellow radio enthusiasts! Let’s chat about something that’s been on my mind lately: how the Amateur Radio Relay League (ARRL) can step up its game and bring more licensed radio operators into the fold. The ARRL has been around for quite a while, and it’s done an awesome job supporting the amateur radio community. But as we all know, times are changing, and it’s time for a little refresh! So grab your favorite drink, kick back, and let’s brainstorm some laid-back ideas to help the ARRL attract more members.
1. Revamping Membership Perks
First off, let’s talk about what it means to be a member. The ARRL already offers some fantastic resources, but why not spice things up a bit? Imagine a treasure trove of digital content—think webinars, how-to videos, and articles on the latest tech. We’re talking everything from software-defined radios to the coolest digital modes.
And let’s not forget about exclusive discounts! Teaming up with gear manufacturers for member-only discounts could really sweeten the deal. Who doesn’t love saving a few bucks on that shiny new radio?
2. Creating a Welcoming Community
Next up, we all know that amateur radio is as much about the community as it is about the technology. The ARRL could do more to foster that sense of belonging. How about supporting local clubs and events? Imagine ARRL-sponsored contests or workshops where operators can gather, share knowledge, and connect over their love of radio.
Plus, a mentorship program could really help newcomers find their footing. Pairing up experienced hams with newbies would make for a welcoming environment and build lasting friendships.
Like What’s Happening Here?
N1JUR is built around helping more people get active in ham radio through videos, Field Notes, POTA content, live streams, gear reviews, and community.
If you already watch the channel and want to support more of the work behind it, memberships are one way to help keep the signal going.
Videos. Field Notes. Live Streams. Community.
Membership support helps keep the N1JUR ecosystem moving without turning every page into a pledge drive wearing a callsign hat.
Learn About the Community →3. Getting the Word Out
Now, let’s think about how the ARRL can reach out to potential members. Targeted marketing campaigns could be super effective. Picture a campaign aimed at young adults, students, or tech enthusiasts highlighting the fun and benefits of being part of the amateur radio world.
And what about community engagement? Organizing local outreach events to showcase amateur radio's role in emergencies and public service could draw in curious folks and show them just how meaningful this hobby can be.
4. Making Membership a Breeze
Nobody likes jumping through hoops, right? So, let’s make the membership process as smooth as possible. A user-friendly website with clear info about membership perks would be a game changer. Plus, offering flexible membership options—like family plans or student discounts—could really open the doors for more folks to join in.
And hey, let’s ensure that inquiries about membership are met with quick and friendly responses. A little hospitality goes a long way!
Want More Portable Radio Content?
Practical portable operating, POTA discussions, gear reviews, Brew & Activate livestreams, and real-world ham radio content.
5. Being the Voice of the Community
Lastly, the ARRL's advocacy work is crucial. It’s all about representing the interests of amateur radio operators, so keeping members informed about policy changes and legislative issues is key. When members feel empowered to take action, they’re more likely to stay engaged and invested in the organization.
Wrapping It Up
The ARRL has an incredible legacy, and with a few tweaks, it can attract a whole new wave of licensed radio operators. By revamping membership perks, fostering community, improving outreach, streamlining processes, and continuing its advocacy work, the ARRL can create an inviting and vibrant space for all amateur radio lovers.
So, what do you think? Let’s keep the conversation going and support the ARRL in making these changes for a brighter, radio-filled future! Happy transmitting!
Keep the Conversation Going
What’s one thing you stopped bringing to activations because you realized you never actually needed it? Drop into the Discord and tell the Brew Crew.
Join the N1JUR Discord
Taking Ham Radio on a Family Vacation Without Becoming That Person
Every vacation location is different.
One Airbnb might have wide-open trees that are perfect for an end-fed. The next might be surrounded by buildings or have no place to throw a line.
Give yourself options.
I almost always pack multiple antennas because I have no idea what the terrain is going to look like until I get there. A little extra planning means you spend more time operating and less time wishing you had packed something different.
Flexibility starts before you even leave home.
When most people pack for vacation, they're thinking about sunscreen, flip-flops, and whether they remembered enough snacks for the drive.
Me?
I'm trying to figure out how many antennas I can fit in the truck without my wife asking, "Do we really need all of those?"
The answer, of course, is yes.
Over the years I've learned that bringing ham radio on a family vacation isn't about squeezing in as many contacts as possible. It's about finding small moments to enjoy the hobby without taking away from the reason you're there in the first place—spending time with the people who matter most.
Here are a few lessons I've picked up along the way.
Bring More Than One Antenna
Every vacation location is different.
One Airbnb might have wide-open trees that are perfect for an end-fed. The next might be surrounded by buildings or have no place to throw a line.
Give yourself options.
I almost always pack multiple antennas because I have no idea what the terrain is going to look like until I get there. A little extra planning means you spend more time operating and less time wishing you had packed something different.
Flexibility starts before you even leave home.
Want More Portable Radio Content?
Practical portable operating, POTA discussions, gear reviews, Brew & Activate livestreams, and real-world ham radio content.
Pack the Little Things
You know what's worse than forgetting your antenna?
Forgetting the one adapter that lets everything work together.
Throw a small bag of adapters in your go-kit. SO-239 to SO-239 barrels, BNC adapters, PL-259 reducers, SMA adapters—whatever fits your gear.
These little pieces weigh almost nothing, but they can save an activation when something doesn't quite fit together the way you expected.
It's one of those items you hope you never need...until you do.
Don't Make Yourself Center Stage
If you're vacationing with family or friends who aren't hams, remember that they're on vacation too.
You don't need to set up your station in the middle of the patio where everyone is trying to relax.
Find a quieter corner. Maybe it's under a tree, off to the side of the campsite, or tucked away on the edge of the property.
Being considerate goes a long way.
As amateur radio operators, we're ambassadors for the hobby. The way we operate around others often shapes how they see ham radio. If we're respectful of their space and their vacation, they're much more likely to see our hobby as something interesting instead of something that's getting in the way.
Keep Wires Out of Traffic Areas
This one sounds obvious, but it's amazing how easy it is to forget when you're excited to get on the air.
Route feed lines where people aren't constantly walking.
Nobody wants to trip over coax carrying a plate of burgers or watch a kid discover your antenna wire the hard way.
A few extra minutes thinking about cable routing can save a lot of headaches—and maybe a broken antenna.
Like What’s Happening Here?
N1JUR is built around helping more people get active in ham radio through videos, Field Notes, POTA content, live streams, gear reviews, and community.
If you already watch the channel and want to support more of the work behind it, memberships are one way to help keep the signal going.
Videos. Field Notes. Live Streams. Community.
Membership support helps keep the N1JUR ecosystem moving without turning every page into a pledge drive wearing a callsign hat.
Learn About the Community →Be Flexible
Vacation schedules change.
Someone wants to go get ice cream.
The family decides to head to the beach.
Dinner gets moved up an hour.
Don't let radio become the thing that keeps everyone waiting.
Some of my favorite contacts have happened during a quick 15- or 20-minute operating session while everyone else was getting ready to head out.
Ham radio is supposed to add to the adventure, not become the entire adventure.
Let the Kids Make the Contacts
This might be my favorite tip.
If there are younger kids around—even if they've never touched a microphone before—invite them to give it a try.
With a little coaching, they can make a contact that they'll remember for years.
You never know whose curiosity you're going to spark.
One short QSO might be the beginning of a lifelong interest in electronics, communications, emergency preparedness, or amateur radio itself.
Sometimes all it takes is hearing someone hundreds or thousands of miles away answer back.
Final Thoughts
I've found that the best vacation operating isn't measured by how many contacts I made.
It's measured by the smiles, the conversations, the curious questions from family members, and those quiet moments where I get to combine two things I enjoy—traveling and ham radio.
Pack smart. Stay flexible. Be considerate of the people around you.
And if you can inspire one new person to pick up a microphone while you're at it?
That's a pretty successful vacation in my book.
Keep the Conversation Going
What’s one thing you stopped bringing to activations because you realized you never actually needed it? Drop into the Discord and tell the Brew Crew.
Join the N1JUR Discord
Dealing with the “Sad Ham” in Our Club: A Personal Perspective
As passionate ham radio operators, we uphold an unspoken creed rooted in our commitment to prepare for and respond to disasters. While our dedication has proven invaluable throughout history, I believe we are not fully leveraging the potential of our hobby for the greater good.
Hey there, fellow hams! Today, I want to share a personal experience that many of us might encounter in our amateur radio clubs: dealing with a “sad ham” who tends to squash every idea that comes up. It can be tough when someone seems to be constantly negative, especially when you’re trying to foster enthusiasm and creativity in your club. I’ve been there, and I’d love to share how I handle these situations while keeping the passion alive—not just for myself, but for everyone involved.
Understanding the “Sad Ham”
First, it’s important to understand where this negativity might be coming from. Often, these individuals feel like their beloved hobby is under threat or that changes might disrupt the status quo they’ve grown comfortable with. It’s easy to fall into a defensive mindset, and sometimes, it manifests as criticism or anger. Recognizing this can help me approach the situation with empathy rather than frustration.
Keep the Conversation Going
What’s one thing you stopped bringing to activations because you realized you never actually needed it? Drop into the Discord and tell the Brew Crew.
Join the N1JUR DiscordListening and Validating
When I encounter a club member who seems down or overly critical, I try to engage them in a one-on-one conversation. I find that simply listening can go a long way. Asking open-ended questions like, “What are your thoughts on this idea?” or “How do you feel about the direction our club is heading?” gives them the space to express their feelings without feeling attacked.
Sometimes, just validating their concerns can change the tone of the conversation. Phrases like, “I understand why you might feel that way,” or “It’s completely valid to be concerned about changes,” can help them feel heard. This acknowledgment can soften their negativity and open the door to a more constructive dialogue.
Finding Common Ground
Once I’ve had a chance to listen, I work on finding common ground. Most of the time, there’s a shared love for amateur radio that connects us all, even with differing opinions. I might say something like, “I know we both care deeply about this club and our community. What if we brainstormed some ideas together that could address your concerns?” This approach turns the conversation from a confrontational debate into a collaborative effort.
Like What’s Happening Here?
N1JUR is built around helping more people get active in ham radio through videos, Field Notes, POTA content, live streams, gear reviews, and community.
If you already watch the channel and want to support more of the work behind it, memberships are one way to help keep the signal going.
Videos. Field Notes. Live Streams. Community.
Membership support helps keep the N1JUR ecosystem moving without turning every page into a pledge drive wearing a callsign hat.
Learn About the Community →Encouraging a Positive Spin
Another strategy I use is to encourage a more positive spin on their critiques. Instead of simply shutting down ideas, I invite them to suggest alternatives. For example, if someone is skeptical about a new event, I might say, “I appreciate your feedback! What aspects do you think we could improve or change to make it more appealing?” This not only empowers them to contribute but also shifts the focus from negativity to constructive problem-solving.
Setting Up a Safe Space
I also believe in creating a safe space for discussion in our club meetings. Setting ground rules around respect and constructive criticism can help everyone feel more comfortable sharing their thoughts. Encouraging everyone to express their ideas without fear of being shot down can slowly change the club culture and help even the “sad hams” feel more included in the brainstorming process.
Keeping the Passion Alive
Finally, I always remind myself—and my fellow members—of why we’re all here in the first place: our passion for amateur radio! By consistently bringing the conversation back to our shared love for the hobby, I can help rekindle that enthusiasm. A simple reminder, like “Remember how much fun we had at the last event?” can inspire us all to focus on the positives.
Closing Thoughts
In the end, handling a “sad ham” in your club is all about empathy, understanding, and collaboration. It’s about reminding them—and ourselves—that our shared passion for radio can unite us, even when opinions differ. So next time you find yourself facing negativity, take a deep breath, listen, and try to steer the conversation toward a more positive and inclusive direction. Together, we can keep the spirit of amateur radio alive and thriving! Happy hamming, everyone!
Keep the Conversation Going
What’s one thing you stopped bringing to activations because you realized you never actually needed it? Drop into the Discord and tell the Brew Crew.
Join the N1JUR Discord
Plant today for ham radio future
As passionate ham radio operators, we uphold an unspoken creed rooted in our commitment to prepare for and respond to disasters. While our dedication has proven invaluable throughout history, I believe we are not fully leveraging the potential of our hobby for the greater good.

As passionate ham radio operators, we uphold an unspoken creed rooted in our commitment to prepare for and respond to disasters. While our dedication has proven invaluable throughout history, I believe we are not fully leveraging the potential of our hobby for the greater good.
Let's delve deeper into this. As licensed amateurs, we are privileged to extend a welcoming invitation to the public, encouraging them to join us in the exciting world of radio experimentation and propagation studies. Moreover, we bear the responsibility to continuously educate and support one another. Even though disaster preparedness remains a crucial focus, I am convinced that as a community of kindred enthusiasts, we must put an end to internal conflicts and elitism, as these issues threaten to divide and weaken our beloved hobby, both online and offline.
Like What’s Happening Here?
N1JUR is built around helping more people get active in ham radio through videos, Field Notes, POTA content, live streams, gear reviews, and community.
If you already watch the channel and want to support more of the work behind it, memberships are one way to help keep the signal going.
Videos. Field Notes. Live Streams. Community.
Membership support helps keep the N1JUR ecosystem moving without turning every page into a pledge drive wearing a callsign hat.
Learn About the Community →What's the underlying issue? Well, there exists a significant generational gap within our ranks. The pioneers and visionaries who propelled amateur radio to its zenith are growing older, and the transmission of their knowledge to the new generation has suffered. I cannot pinpoint a single cause, but after returning from a two-decade hiatus, I am troubled by the prevailing mindset that resists change, clinging to the notion that "it's always been this way."
Want More Portable Radio Content?
Practical portable operating, POTA discussions, gear reviews, Brew & Activate livestreams, and real-world ham radio content.
We have all observed that technology progresses relentlessly, irrespective of any resistance. Therefore, if you are an active participant in our vibrant hobby, I not only suggest but implore you to consider the following: let's embrace a mindset that welcomes change, encourages innovation, and fosters inclusivity. It is only through such an approach that we can ensure the enduring success and relevance of amateur radio in the dynamic landscape of today's world.
Keep the Conversation Going
What’s one thing you stopped bringing to activations because you realized you never actually needed it? Drop into the Discord and tell the Brew Crew.
Join the N1JUR Discord